Friday, September 30, 2011

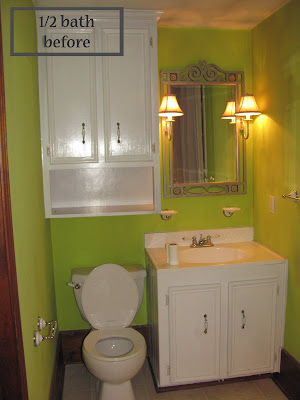
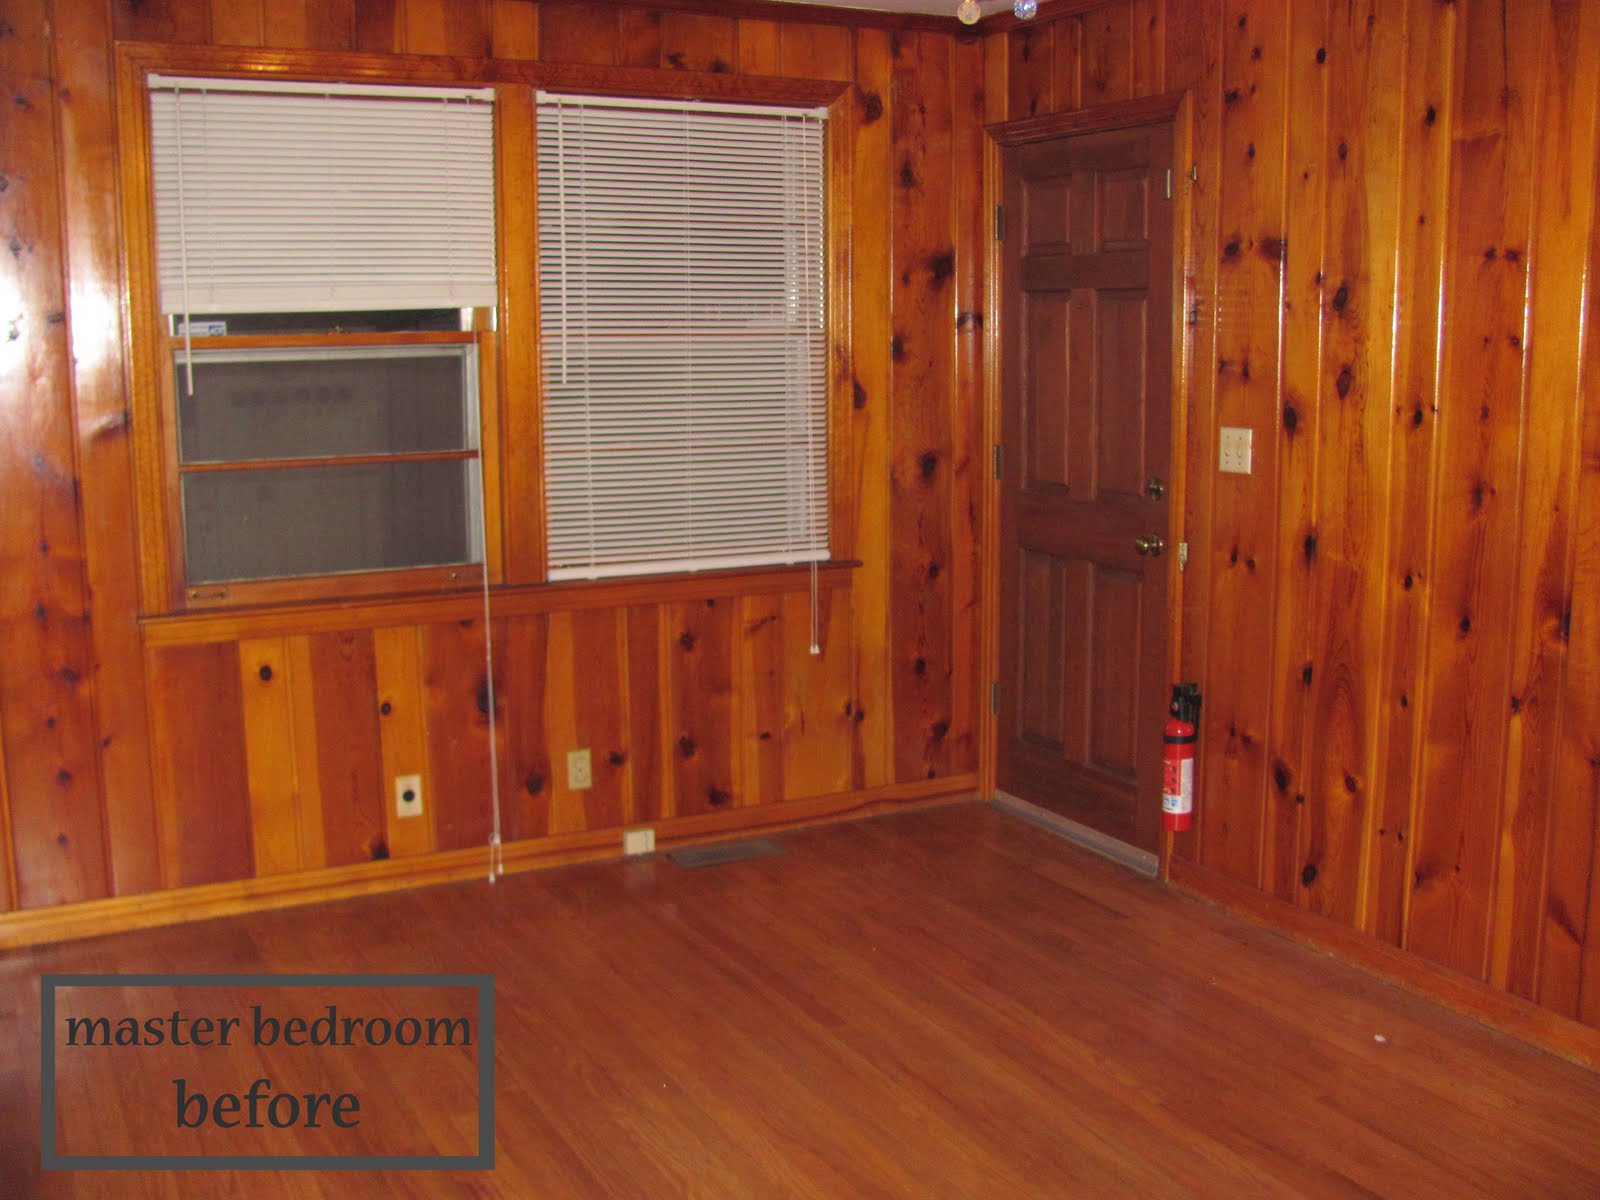
Before & After: 6 Month Update

I cannot believe we have only been living in our new home for 6 months. We've owned it for 7 months now (we waited about a month to move in), but it feels like we've been here forever. Even though there is still a laundry list of things to accomplish, it amazes me how much we have accomplished in such a small amount of time.

Here are the Before & After photos of the house after 7 months of ownership:


So there is also a kitchen and another bedroom, but we've made little progress on the kitchen and NO progress on the other bedroom. (Not to mention the kitchen looks like a hot mess at the moment.) Therefore, we won't be viewing those right this minute. I'll give you an update on those soon.

Not bad progress for 6 months, huh? We're pretty proud or as Nate would say..."house proud".

Until next time...

Sunday, September 25, 2011

Jungle Baby Shower


This weekend I celebrated the upcoming baby boy, Jamey Myers at an adorable, jungle-themed baby shower. My friend Trish hosted and did most of the decor, but I assisted by making a banner for the baby to be. The cute handmade favor box below was the jumping off point for my banner.

Here are a few pictures of the shower. Don't you just love the receiving blanket diaper cake? So sweet!


And here's a closer look at the banner I made before I brought it over to the shower. I just love the animal stickers I found at Michael's. Got to love the scrapbook section!


I have plenty of showers coming up in my future since I'm still surrounded by pregnant people so I'm sure I'll have a few more banners to show soon.

Until next time...
Photobucket

Thursday, September 22, 2011

September isn't a good month...

I love September. It's the start of fall, it's our wedding anniversary month and it marks six months of us living in our home. It's a good month overall, but it obviously isn't a good month for our home projects. As you can tell by the lack of posting, we really haven't accomplished much this month. I do, however, have some projects coming up that I'll be able to give you a lovely post on. 

First, I'm helping with a baby shower by making an adorable banner in the party theme. I just can show it off until after the shower on Saturday. Here's an inspiration picture to give you an idea of where it's headed. (Just add in a jungle theme.)
I'll also be giving you all the before and after photos of our house as we hit our 6 months of living in our 1950's ranch. You'll get to see the rooms that have made amazing progress as well as those that obviously haven't been touched. 

See, there's still a reason to check in with me. I won't fail completely in the month of September. I promise.

Until next time...
Photobucket

Thursday, September 15, 2011

Inspired: Tablescapes

To host a seriously spectacular gathering you really need an amazing tablescape. I don't typically go all out on the table decor, but I'm hoping to dive into it one day. Until then, I'm loving all this inspiration.

source
source
source
source
source
source
source
source
source
source
Makes me want to have a party, like now.  Any takers?

Until next time...
Photobucket

Monday, September 12, 2011

Some Sweet Gifts

My husband kicked butt with the birthday gifts this year. He knocked it out of the park with his home decor choices for me. Now, you really need to see them in person to get full appreciation since our camera sucks, (Birthday next year?) but you'll get the idea.

First, check out the adorable pendant fixture he got me for our dining room WITHOUT me asking for it. So freaking fabulous.


Next I got a West Elm vase to go in our guest room:


And finally, my hubby got me two super cute ceramic fish (also from West Elm) that I've been crushing on for awhile. Check out these cuties:


In conclusion, my hubby rocks.

Until next time...
Photobucket

Wednesday, September 7, 2011

Thrift Store Inspired: Wall Art Collage

It's been too long since I've posted so we're skipping WOW wednesday today. Long weekends and vacations throw me off my blogging routine so let's dive on in, shall we?


I am basically obsessed with wall art collages. I love the look of one major focal point on a wall made up of a variety of pieces. My favorite thing is that it's easy to create a collage on a budget which is more than I can say for most large pieces of art. 

Here are some examples of some killer wall art collages:
I wanted to take this idea and create my own collage for our dining room. My goal was to create a casual, collected-over-time look without spending a ton of money. Here's the breakdown on how I managed to create a large focal point in my dining room without breaking the bank.

I began by using our new console table to determine how large my wall art collage was going to be, since it was already creating a focal point in the room. Then I started collecting my individual pieces of art. 


I took a trip to a local thrift store and found a few frames, mirrors and art. Then I grabbed a few decorative plates on clearance at West Elm to throw in the mix. Finally, I collected a few things from the house to help fill in the holes.

Next it was time to start determining my layout.  I started with my largest item, a mirror that has been sitting in storage since we've moved. It has a small broken piece on the frame and hanging it alone would have put a spotlight on its flaw, but in a group, it should be unnoticeable. I placed the mirror on the right end of the console table, opposite from the lamp to help balance it out. It gave me a large item on each side, one gives light, the other reflects light. Perfect.


Once I had my largest items in place, (lamp and mirror) I moved on to my smaller items which consisted of 2 black frames we already had, 1 light colored frame from a thrift store, 1 oval mirror from a thrift store, my 2 west elm plates, 1 random piece of framed art from a thrift store, 1 $10 frame hanging from a skeleton key and 1 teeny, tiny tile we had at the house. I basically played around with my options by holding them each up in a location and deciding if I thought it would work or not. 


These are the questions I asked myself along the way:
  • Does this seem balanced?Does it feel too weighted to one side or the other?
  • Does everything seem spaced out fairly equally?
  • Do I dig it?

I worked on finding a spot for one item at a time. If it worked, I hung it up and moved on to the next piece. I just worked it like a puzzle until I felt that it looked finished enough. The great thing is that I can easily switch things out if I get bored or I could just continue to add more items. The key was to have a variety of items. There are plenty of things that I didn't ultimately use this time around.

For those of you who appreciate a visual aid before committing to hammering nails into your wall, I suggest using pieces of paper cut to the size of each item. You can just tape these pieces of paper onto your wall until you find your perfect layout. Then jump into the nailing of items. I, however, went a little crazy and decided that I'd just throw everything up there and see if I liked it. If not, I'd start again. Nothing lost, just some extra holes in the wall. Luckily, I managed to create something I like...for now at least.

Here's the result so far:


I'll give some detail photos coming up soon. I created a couple super cheap and easy pieces of art along the way. All in an afternoon!

Until next time...
Photobucket