Wednesday, September 7, 2011

Thrift Store Inspired: Wall Art Collage

It's been too long since I've posted so we're skipping WOW wednesday today. Long weekends and vacations throw me off my blogging routine so let's dive on in, shall we?


I am basically obsessed with wall art collages. I love the look of one major focal point on a wall made up of a variety of pieces. My favorite thing is that it's easy to create a collage on a budget which is more than I can say for most large pieces of art. 

Here are some examples of some killer wall art collages:
I wanted to take this idea and create my own collage for our dining room. My goal was to create a casual, collected-over-time look without spending a ton of money. Here's the breakdown on how I managed to create a large focal point in my dining room without breaking the bank.

I began by using our new console table to determine how large my wall art collage was going to be, since it was already creating a focal point in the room. Then I started collecting my individual pieces of art. 


I took a trip to a local thrift store and found a few frames, mirrors and art. Then I grabbed a few decorative plates on clearance at West Elm to throw in the mix. Finally, I collected a few things from the house to help fill in the holes.

Next it was time to start determining my layout.  I started with my largest item, a mirror that has been sitting in storage since we've moved. It has a small broken piece on the frame and hanging it alone would have put a spotlight on its flaw, but in a group, it should be unnoticeable. I placed the mirror on the right end of the console table, opposite from the lamp to help balance it out. It gave me a large item on each side, one gives light, the other reflects light. Perfect.


Once I had my largest items in place, (lamp and mirror) I moved on to my smaller items which consisted of 2 black frames we already had, 1 light colored frame from a thrift store, 1 oval mirror from a thrift store, my 2 west elm plates, 1 random piece of framed art from a thrift store, 1 $10 frame hanging from a skeleton key and 1 teeny, tiny tile we had at the house. I basically played around with my options by holding them each up in a location and deciding if I thought it would work or not. 


These are the questions I asked myself along the way:
  • Does this seem balanced?Does it feel too weighted to one side or the other?
  • Does everything seem spaced out fairly equally?
  • Do I dig it?

I worked on finding a spot for one item at a time. If it worked, I hung it up and moved on to the next piece. I just worked it like a puzzle until I felt that it looked finished enough. The great thing is that I can easily switch things out if I get bored or I could just continue to add more items. The key was to have a variety of items. There are plenty of things that I didn't ultimately use this time around.

For those of you who appreciate a visual aid before committing to hammering nails into your wall, I suggest using pieces of paper cut to the size of each item. You can just tape these pieces of paper onto your wall until you find your perfect layout. Then jump into the nailing of items. I, however, went a little crazy and decided that I'd just throw everything up there and see if I liked it. If not, I'd start again. Nothing lost, just some extra holes in the wall. Luckily, I managed to create something I like...for now at least.

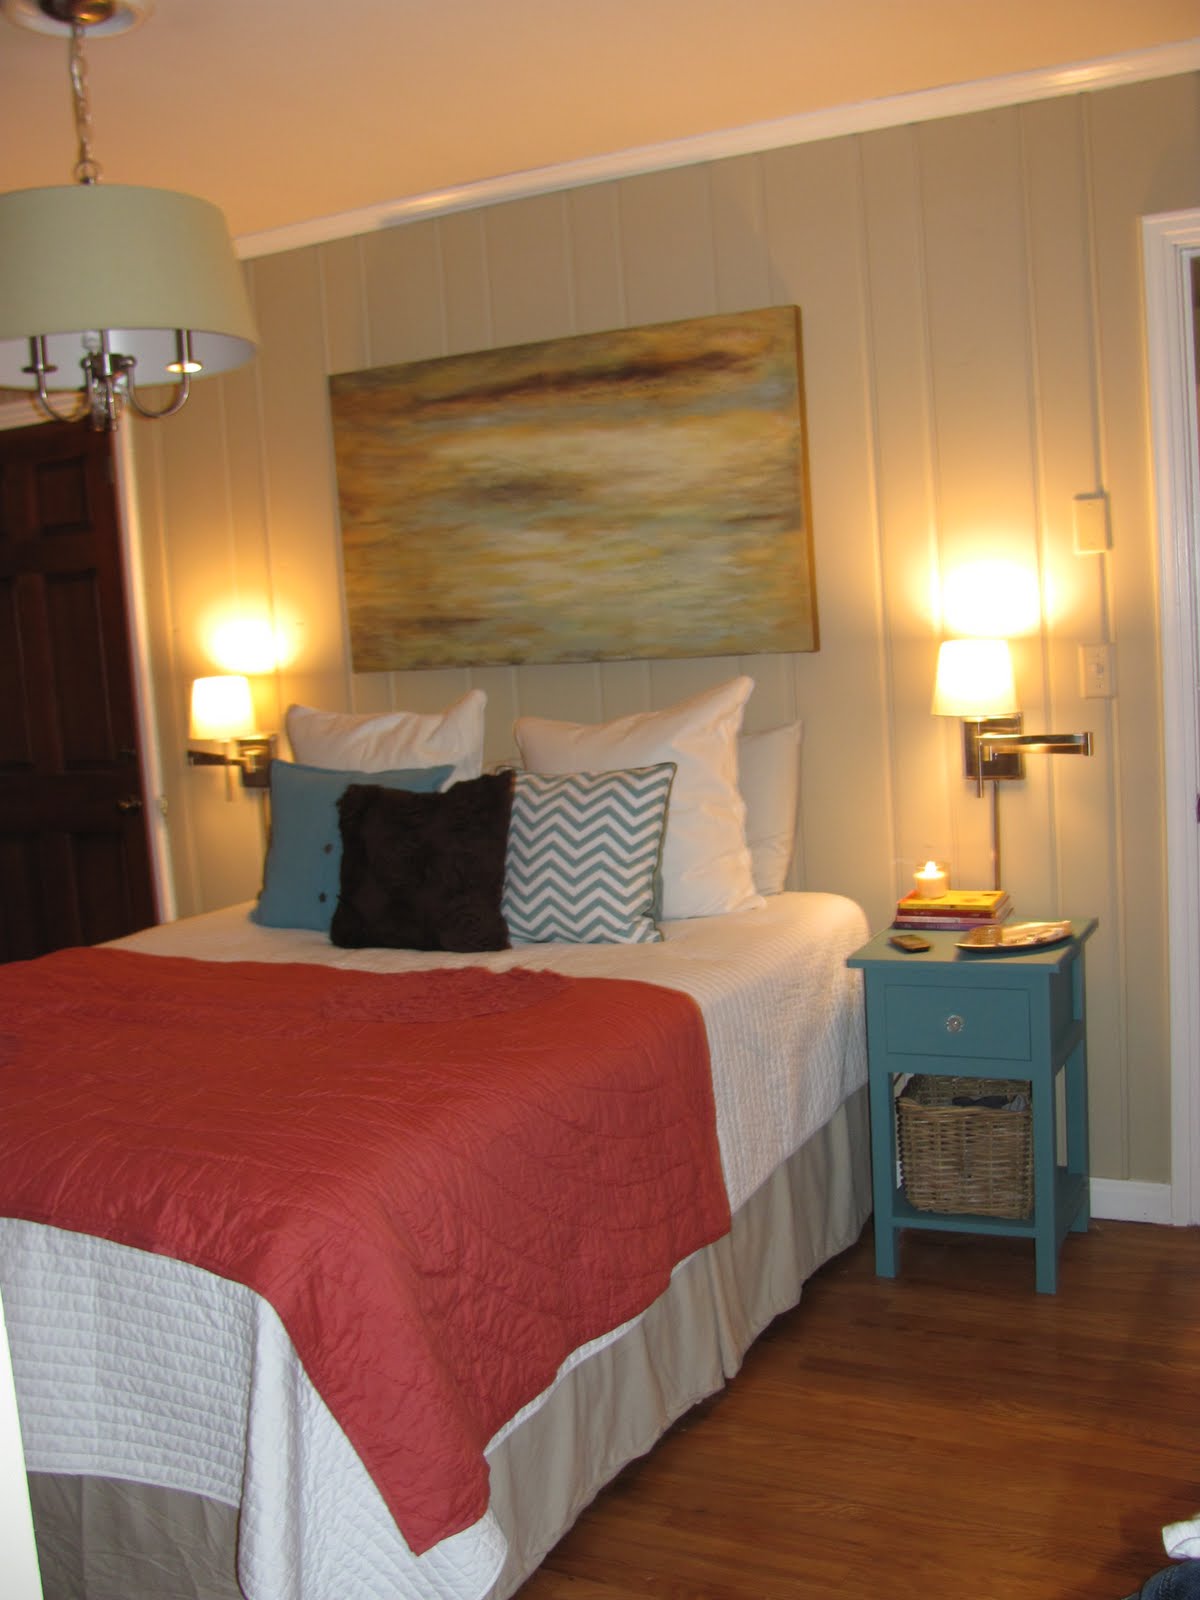
Here's the result so far:


I'll give some detail photos coming up soon. I created a couple super cheap and easy pieces of art along the way. All in an afternoon!

Until next time...
Photobucket

Wednesday, August 31, 2011

WOW wednesday: Beautifully Simple

I'm obsessed with Kara's Pary Ideas which is a blog that features every sort of home party you can imagine. I'm really hoping to make a career of planning at home parties one day so it is a fabulous source of inspiration. 

This particular party featured on Kara's Party Ideas is one of my favorites due to its beautifully simple design and budget friendly decor. Check out this adorable Aqua & Red 1st Birthday Party:

Photobucket

Photobucket

Photobucket

Photobucket

Photobucket

Photobucket

Photobucket

Adorable right? It is so wonderful since it is a party anyone could do in their home. This party's design shows that sometimes less is more. If you want all the details, check out Kara's Party Ideas. You're bound to find a party that you are in love with!

So much fun!

Until next time...
Photobucket

Saturday, August 27, 2011

Pee Worthy?

OK, weird title, I know, but stick with me here.

Our home's half bathroom/laundry room has been a source of design stress for me since we moved in. It is an awkward layout because of the washer and dryer hookup locations and more importantly because THERE IS A BATHROOM IN THE LAUNDRY ROOM! It's a little strange. 

Here's a look at what it looked like when we bought the house:


As you can tell, this is the room that sold us on this home. Isn't she beautiful? (That square thing on the left isn't a washer or dryer...it's the hot water heater.)

OK. Let's be serious, it's scary and that green wall color isn't helping anything. So the first thing we did was paint the entire room a neutral color. We also removed the black baskets to help de-clutter the laundry room side. The layout really couldn't be helped so we've kept it as is, but a few cute baskets for organizations and some artwork helped give the laundry side of the room some design help. We also finally hung up our ironing board which gets it off the ground and gives a little more room to move. 

Here's what that side of the room looks like now:


Now the bathroom side of the room needed some serious help as well. Basically the goal was to figure out a way to make it feel like a bathroom that isn't in a laundry room. 

Here's what we've done to help make this bathroom nice enough for our friends to pee in:

  • We took down the swirly mirror with the built in lights since it wasn't really our style. (I tried painting it a bright color to make it work since the lights being attached is super handy, but I still didn't dig it so it got trashed.)
  • The mirror was replaced with a simple oval mirror with a dark brown wood frame. 
  • We also replaced the cabinet pulls. The silver and white combo that was originally there was upgraded to a simple bronze pull. 
  • The light was a pain to figure out how to replace since the electrical box was in the wall and NOT centered. It made life a challenge, but luckily we found a solution with a $15 target pendant light. 
  • I added a rug which perfectly fills the area in front of the sink and toilet and brings your eye to that space instead of the laundry area. 
  • The window got a lovely bamboo shade to add privacy. (Kinda important in a bathroom.)
  • I also put up two inexpensive pieces of artwork, one on each side of the window to tie both sides of the room together. 

Check out the pictures of our newly updated space:


So it's still a little awkward considering the first thing you see when you open the door is a dryer, but it is leaps and bounds from where it started. I'm digging it and I'm super excited that I can now call this room "pee worthy". What a victory, right?

Until next time...
Photobucket

Wednesday, August 24, 2011

WOW wednesday: I Love Chihuly

So a while back Brent and I got to see the most AMAZING Chihuly exhibit at Cheekwood here in Nashville. I was geeking out during the entire thing and I'm pretty sure I still drool every time I see a photo of his work. 

For those of you who aren't familiar with Dale Chihuly, here is a quick run-down: He is a glass blower who is "the man" in the his industry. He was actually introduced to glass while studying interior design (which I totally dig) and his work is in more than 200 museum collections worldwide. Basically, he is awesome.

So let's see if you start drooling...(and all these pictures come from the Chihuly website.)

THE BOATS, 2008


 PERSIAN PERGOLA CEILING, 2002

SCORPION TAILS AND BAMBOO, 2008

 WALLA WALLAS, 1996

That's just a taste of his skills. Check out his website, http://www.chihuly.com/, to see more pictures and if you are ever near an exhibit, you MUST GO.


Until next time...
Photobucket

Sunday, August 21, 2011

Pillows, Pillows, Curtains & Pillows

Thanks to the always wonderful "birthday money", Brent and I were able to make some major progress in our master bedroom. There's a ton more to be done, but it has been fun to get it started. The hubbs and I have shopped for everything together so far which always makes things a little more entertaining.

We did most of our damage at West Elm (our favorite store) where we grabbed three pillows, two window panels and three plates (not for the bedroom). Then we finished up at Target where we snagged new sheets and two more pillows. Yes, more pillows.

So here's what we don't like about the original master bedroom design:
  1. Too many empty walls
  2. Too neutral 
  3. Too matchy-matchy
  4. Not cheery/fun enough
  5. Too dark

Now, here's what we are wanting to achieve in the master makeover:
  1. Lots more color combos
  2. More fun patterns
  3. Lots of wall art
  4. Brighter
  5. Casual, cozy & welcoming
Step 1: Kick up the Color. It all started with the West Elm ruffled-circle quilt that the hubbs and I picked out a while back in the "poppy" red color. Then we painted our new side table "Hallowed Hush" blue. Our goal this weekend was to continue our new color theme throughout the room and to bring in a bit of pattern.


To see what we started with, click here.

Here are some pictures of our efforts so far:


It already feels much more playful than where we started. We're digging it. How about you?


Until next time...
Photobucket

Wednesday, August 17, 2011

WOW wednesday: For the Love of Pets

My husband emailed me this article a couple days ago and I just had to share. It's all about having pet built-ins in your home. I'm just going to share the pictures, but if you want the details you can check out the article here

All I can say is "Wow, they love their pets!"

custom built-in dog bed sleeping area under roof eaves

custom built-in dog bed area with doors under staircase

custom dog bed nook with vintage grate door

custom laundry room with built-in dog bed area and grooming sink

custom hutch with cat silhouette door cut out for hidden litter box

custom built-in dog crates and raised feeding station in kitchen

custom island with inset dog bowls and dog bone shaped drawer pull cut outs

I love my furbabies dearly, but how far would I go to make them comfortable in my home? Would you take your pets into consideration while building your house or making renovations? 

Until next time...
Photobucket

Monday, August 15, 2011

Monday Night: Master Bedroom Progress

The hubby and I both have August birthdays, (my brother-in-law does too, but who really cares) so we went to hangout with my family in Memphis this weekend to celebrate before my little sister heads back to school in Knoxville. We had a lot of fun and came back with another couple items for our house!

Our amazing, (and now blue) father-built bedside table now has a friend! My parents got me two swing-arm wall sconces for our master bedroom. They will work perfectly for night time reading (Who wants to walk across the room to turn off the light when you're all comfy, cozy in bed? Not this lazy girl.) and they really dress up our lovely paneled walls. 

Take a peek:


We have one on each side of the bed, but due to a lack of light bulbs, I couldn't photograph both at the same time. You'll just have to trust me that they look great together. 

The lamps and the bedside table are a great start to our bedroom change up. It is very neutral at the moment, which works fine, but isn't too exciting. We are wanting to amp up the color and add in some texture to wake this room up a bit. I can't wait to show you some pictures as we make the changes, but for now here is a view of the comforter we are switching to from West Elm. Luckily, we snagged it on sale a couple weekends ago. We just need to switch out some pillows before putting it to use.

Ruffled-Circle Quilt + Shams

I know what you're thinking...pink in the bedroom? But it's really "poppy" red, not pink. So yeah, my husband is cool with pink.

Until next time...
Photobucket